Introduction
The EmbedOps CLI is the primary way a developer will interact with EmbedOps. It lets you register and start new EmbedOps projects, add functionality for building or testing your project, track requirements locally, and more.
Want to jump in?
Want to skip the in-depth info and get your hands dirty? Start using the EmbedOps CLI right away with the EmbedOps CLI Quickstart Guide!
Architecture
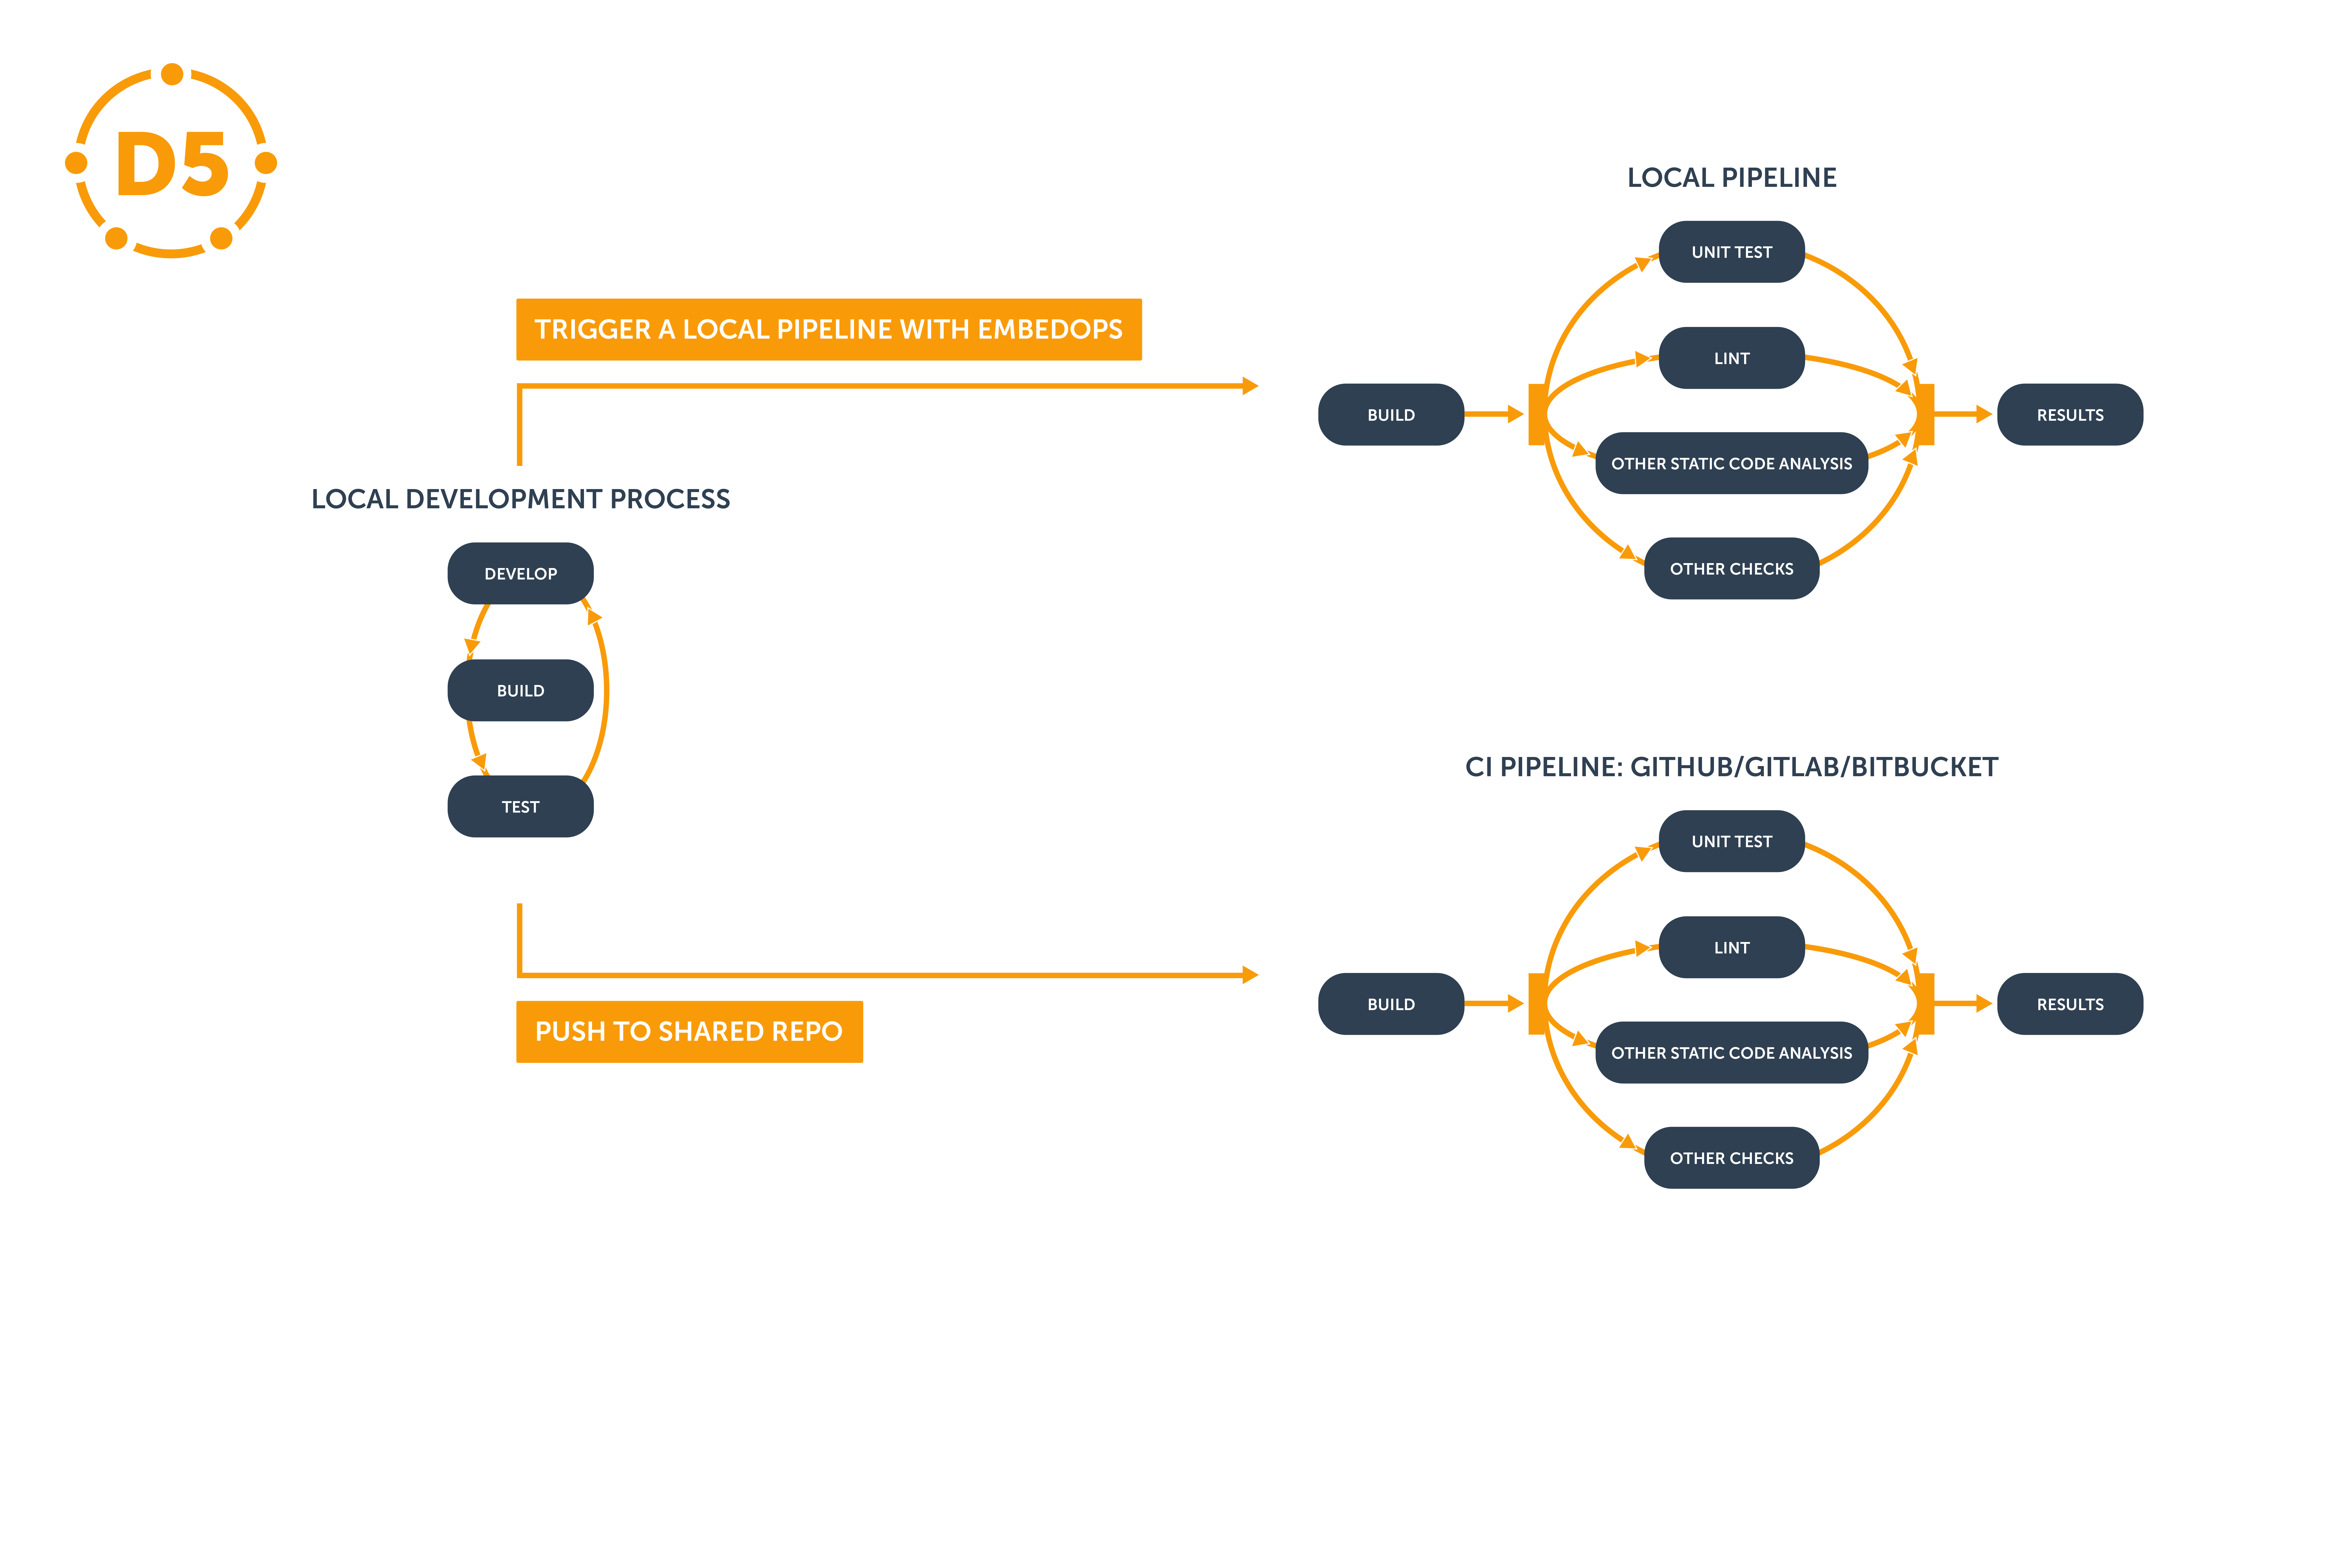
The EmbedOps CLI runs on your developer machine, and creates a dev container with all the tooling needed for the standard Develop->Build->Test development process. It also creates a series of jobs that can be run in a pipeline, either locally on your developer machine, or remotely on one of the supported CI pipeline providers (e.g. Github, Gitlab, or Bitbucket).
Use of Dev Containers
EmbedOps depends on Dev Containers, and requires an installed Docker runtime on your machine. Dev Containers use Docker to isolate and manage the versioning and tools needed as part of the development process, which lets developers share the exact same development environment. Dev Containers add more functionality on top of Docker containers. For example, it lets you easily share files from your developer machine with the container, so the code can live on your computer like normal. Dev Containers also support features, which are collections of tools commonly used by developers that can be quickly added to a Dev Container. So instead of tweaking a docker container image file, a developer can add a feature to the devcontainer.json file and the Dev Container is ready to go.
Dev Containers also have in-built support with VS Code and the Dev Containers Extension, making it easy to switch between dev containers and locally via the IDE GUI.
Use of Pipelines
Continous integration verifies that a shared code repo is in a known-good state at a given time. This happens via "pipelines", which contain a series of steps (or "jobs") to build and test the current latest version of the code, and alerting you if the codebase is broken. Normally, pipelines are run on every check-in to the shared repo, though they can also be triggered at different times, such as nightly, or before a release. Most shared repo tools support CI pipelines out of the box, like Gitlab, Github, or Bitbucket. However, how to configure the pipelines is often provider-specific, requiring you to learn yet another tool.
EmbedOps deals with this problem by auto-generating the appropriate files to let you take advantage of the CI providers pipelines without any work from you, outside of setting which CI provider you want to work with. Additionally, EmbedOps CLI lets you run the exact same series of steps locally on your developer machine, letting you see exactly what will happen once their copy of the code is checked in.
Use of Templates
EmbedOps Templates are a combination of files on your local filesystem, pipeline/CI scripts, and dev container features that work together to provide functionality needed for development. These templates are managed by the EmbedOps Platform and the EmbedOps team. This allows you to add unit tests, or linters, or hardware-in-the-loop support, all with a single eo add.
If you go through the EmbedOps CLI Quickstart and install eo, you can see a list of templates you can apply.

